Difference between revisions of "Android E-mail"
From SupraWiki
| Line 1: | Line 1: | ||
[[category:Email Client Setup]] | [[category:Email Client Setup]] | ||
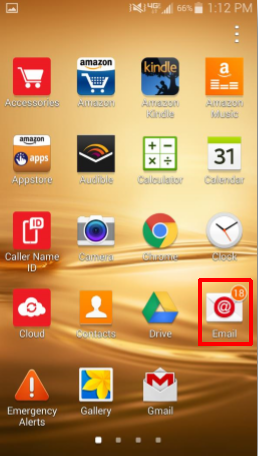
| − | + | From the app menu, touch the E-Mail icon. If you do not have an account configured, it will prompt you for settings. | |
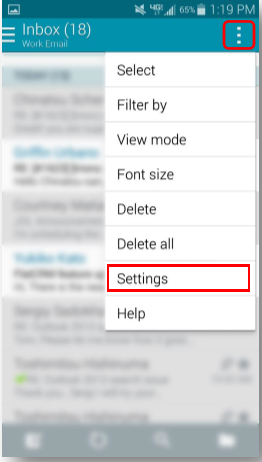
| − | + | If this is not your first account, click the "more" three dots and select '''settings'''. | |
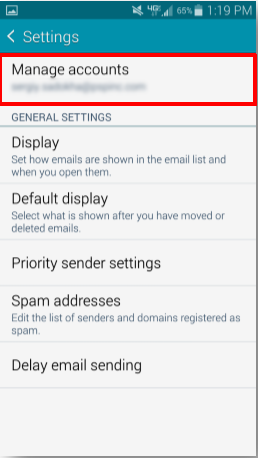
| − | + | Then Click '''Manage Accounts'''. | |
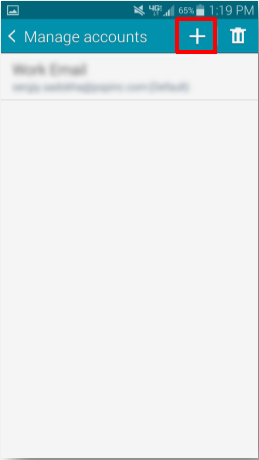
| − | + | Select the plus arrow to add an account | |
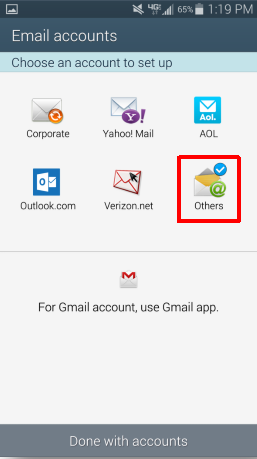
| − | + | And select '''Others''' | |
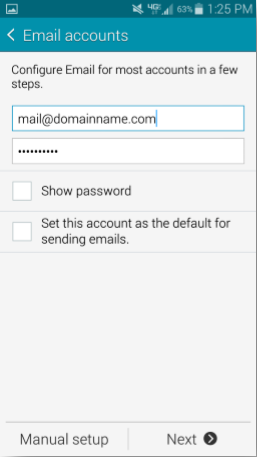
| − | + | Enter your full email address and password | |
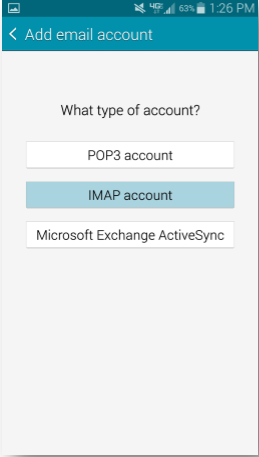
| − | + | Select IMAP account (or POP3 if that is what you'd prefer) | |
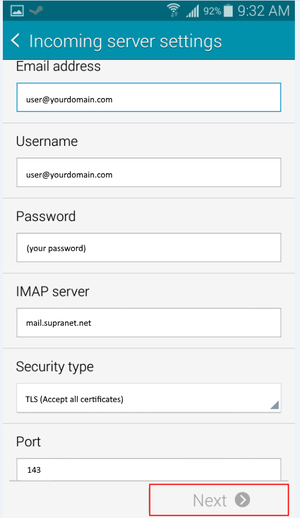
| − | + | Enter the following Incoming server information (port 110 if you chose POP3) | |
| + | |||
| + | Enter the following Outgoing server information | ||
<br><br>[[Image:android1.PNG]]<br><br> | <br><br>[[Image:android1.PNG]]<br><br> | ||
| Line 34: | Line 36: | ||
<br><br>[[Image:android9.png|300px]]<br><br> | <br><br>[[Image:android9.png|300px]]<br><br> | ||
| + | |||
| + | <br><br>[[Image:android10.PNG]]<br><br> | ||
| + | |||
| + | <br><br>[[Image:android11.PNG]]<br><br> | ||
Revision as of 13:49, 10 July 2017
From the app menu, touch the E-Mail icon. If you do not have an account configured, it will prompt you for settings.
If this is not your first account, click the "more" three dots and select settings.
Then Click Manage Accounts.
Select the plus arrow to add an account
And select Others
Enter your full email address and password
Select IMAP account (or POP3 if that is what you'd prefer)
Enter the following Incoming server information (port 110 if you chose POP3)
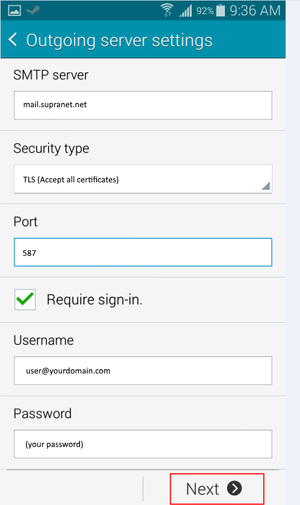
Enter the following Outgoing server information
