Difference between revisions of "Apple Mail in Mac OS X 10.4"
From SupraWiki
Wiki admin (Talk | contribs) m (Apple Mail Setup In Mac OS X 10.4 moved to Apple Mail in Mac OS X 10.4) |
Wiki admin (Talk | contribs) (Complete rewrite) |
||
| Line 1: | Line 1: | ||
[[category:Email Client Setup]] | [[category:Email Client Setup]] | ||
| − | + | To add a new account to Apple Mail (Mac OS X 10.4): | |
| − | + | ||
| − | ''' | + | # Open Apple's Mail application.<br>[[Image:apple_mail_10_4_step1.png]]<br><br> |
| − | + | # Choose '''Preferences''' from the '''Mail''' menu. If you have not yet set up any accounts, the Mail Setup window appears, and you can skip to Step 5.<br><br> | |
| − | + | # Click the Accounts icon in the Mail Preferences window.<br>[[Image:apple_mail_10_4_step3.png]]<br><br> | |
| − | + | # Click Create Account (the plus sign icon in the lower-left of the window).<br>[[Image:apple_mail_10_4_step4.png]]<br><br> | |
| − | + | # Click Continue.<br>[[Image:apple_mail_10_4_step5.png]]<br><br> | |
| − | + | # Choose '''POP''' from the '''Account Type''' menu. Enter a description that will help you distinguish this mail account from others on this computer for '''Account Description'''. Enter your name as you want it to appear on your outgoing email for '''Full Name'''. Enter your email address for '''Email Address'''. (If you don't have this information, please [http://supranet.net/contact.php contact SupraNet] or your network administrator for assistance.) Click Continue.<br>[[Image:apple_mail_10_4_step6.png]]<br><br> | |
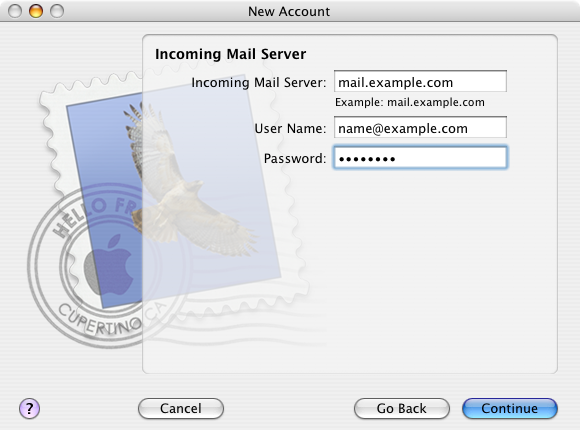
| − | + | # Enter your mail server for '''Incoming Mail Server'''. Enter your email address for '''User Name'''. Enter your email password for '''Password'''. Click Continue.<br>[[Image:apple_mail_10_4_step7.png]]<br><br> | |
| − | + | # Uncheck '''Use Secure Sockets Layer (SSL)'''. Choose '''Password''' from the '''Authentication''' menu. Click Continue.<br>[[Image:apple_mail_10_4_step8.png]]<br><br> | |
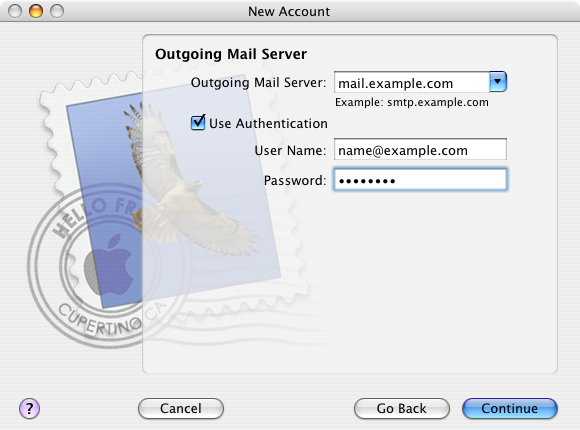
| − | + | # Enter your mail server for '''Outgoing Mail Server'''. Check the box marked '''Use Authentication'''. Enter your email address for '''User Name'''. Enter your email password for '''Password'''. Click Continue.<br>[[Image:apple_mail_10_4_step9.png]]<br><br> | |
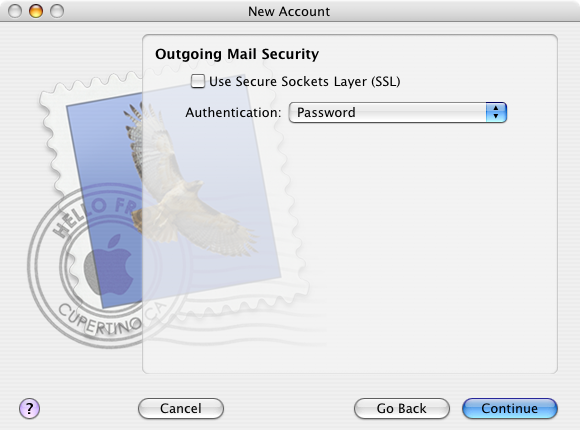
| − | + | # Uncheck '''Use Secure Sockets Layer (SSL)'''. Choose '''Password''' from the '''Authentication''' menu. Click Continue.<br>[[Image:apple_mail_10_4_step10.png]]<br><br> | |
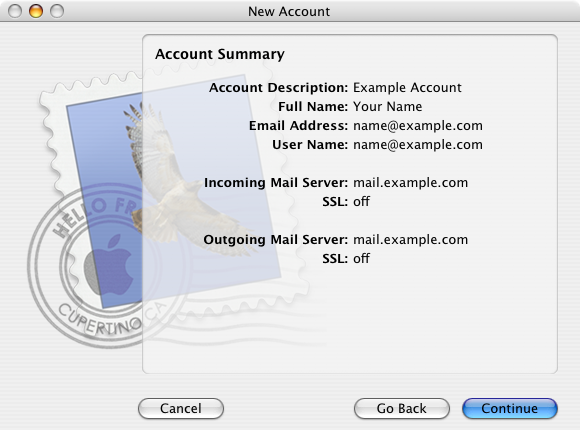
| − | + | # Make sure that the settings on the Account Summary screen are correct. Click Continue.<br>[[Image:apple_mail_10_4_step11.png]]<br><br> | |
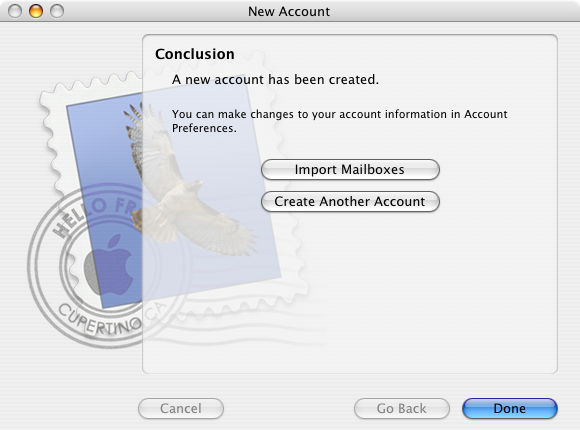
| − | + | # Click Done.<br>[[Image:apple_mail_10_4_step12.png]]<br><br> | |
| − | + | # If you are not already on the Accounts icon in the Mail Preferences window, choose '''Preferences''' from the '''Mail''' menu and click the Accounts icon.<br>[[Image:apple_mail_10_4_step3.png]]<br><br> | |
| − | + | # Select the account you just created from the list on the left. Click '''Server Settings...'''.<br>[[Image:apple_mail_10_4_step14.png]]<br><br> | |
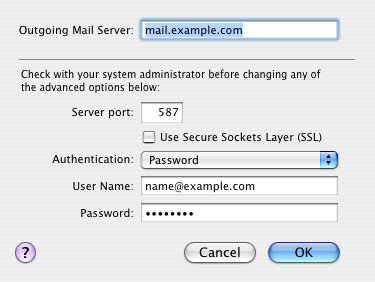
| − | + | # Enter '''587''' for '''Server port'''. Uncheck '''Use Secure Sockets Layer (SSL)'''. Choose '''Password''' from the '''Authentication''' menu. Enter your email address for '''User Name'''. Enter your email password for '''Password'''. Click OK. <br>[[Image:apple_mail_10_4_step15.png]]<br><br> | |
| − | + | # Close the Mail Preferences window.<br><br> | |
| − | + | # That's it! Your new SupraNet email account is set up. If you received errors during your setup, or your new mail account doesn't work, please [http://supranet.net/contact.php contact SupraNet]. | |
| − | + | ||
| − | + | ||
| − | + | ||
| − | + | ||
| − | + | ||
| − | + | ||
| − | + | ||
| − | + | ||
| − | + | ||
| − | + | ||
| − | + | ||
| − | + | ||
| − | + | ||
| − | + | ||
| − | + | ||
| − | + | ||
Latest revision as of 18:06, 19 June 2008
To add a new account to Apple Mail (Mac OS X 10.4):
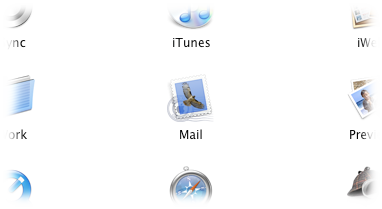
- Open Apple's Mail application.
- Choose Preferences from the Mail menu. If you have not yet set up any accounts, the Mail Setup window appears, and you can skip to Step 5.
- Click the Accounts icon in the Mail Preferences window.

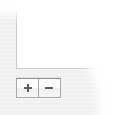
- Click Create Account (the plus sign icon in the lower-left of the window).
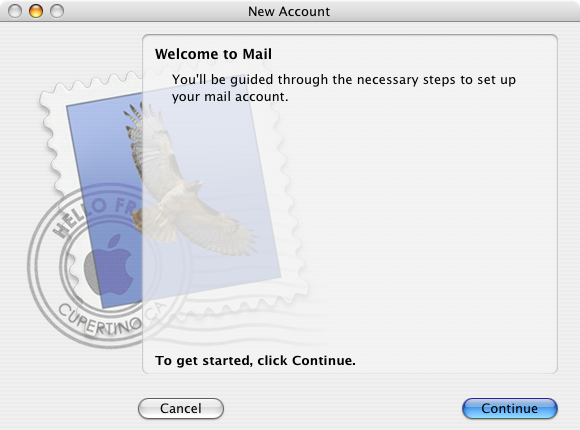
- Click Continue.
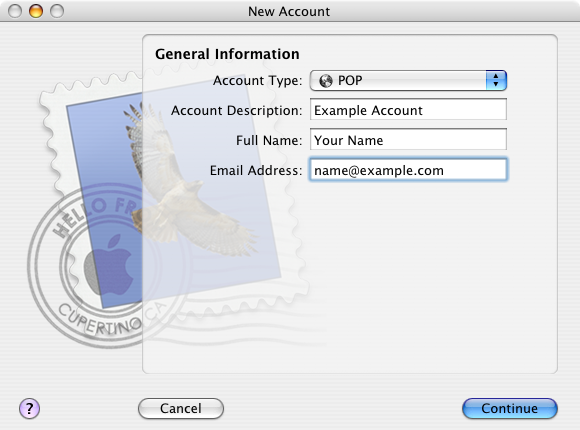
- Choose POP from the Account Type menu. Enter a description that will help you distinguish this mail account from others on this computer for Account Description. Enter your name as you want it to appear on your outgoing email for Full Name. Enter your email address for Email Address. (If you don't have this information, please contact SupraNet or your network administrator for assistance.) Click Continue.
- Enter your mail server for Incoming Mail Server. Enter your email address for User Name. Enter your email password for Password. Click Continue.
- Uncheck Use Secure Sockets Layer (SSL). Choose Password from the Authentication menu. Click Continue.

- Enter your mail server for Outgoing Mail Server. Check the box marked Use Authentication. Enter your email address for User Name. Enter your email password for Password. Click Continue.
- Uncheck Use Secure Sockets Layer (SSL). Choose Password from the Authentication menu. Click Continue.
- Make sure that the settings on the Account Summary screen are correct. Click Continue.
- Click Done.
- If you are not already on the Accounts icon in the Mail Preferences window, choose Preferences from the Mail menu and click the Accounts icon.
- Select the account you just created from the list on the left. Click Server Settings....

- Enter 587 for Server port. Uncheck Use Secure Sockets Layer (SSL). Choose Password from the Authentication menu. Enter your email address for User Name. Enter your email password for Password. Click OK.
- Close the Mail Preferences window.
- That's it! Your new SupraNet email account is set up. If you received errors during your setup, or your new mail account doesn't work, please contact SupraNet.


