Difference between revisions of "Microsoft Outlook 2010"
From SupraWiki
Wiki admin (Talk | contribs) (Created page with 'category:Email Client Setup To add a new account to Outlook 2010: # Open Outlook 2010. # Select the File tab and click on '''Add Account'''<br><br>[[Image:Outlook2010-1.png…') |
Wiki admin (Talk | contribs) |
||
| Line 9: | Line 9: | ||
# Enter your information in the fields provided. Your incoming and outgoing mail server will be '''mail.'''''yourcompany'''''.com'''. Your user name will be your full email address including '''@yourcompany.com''' portion. <br><br>[[Image:Outlook2010-5.png]]<br><br> | # Enter your information in the fields provided. Your incoming and outgoing mail server will be '''mail.'''''yourcompany'''''.com'''. Your user name will be your full email address including '''@yourcompany.com''' portion. <br><br>[[Image:Outlook2010-5.png]]<br><br> | ||
# Click the '''More Settings...''' button in the lower right corner. | # Click the '''More Settings...''' button in the lower right corner. | ||
| − | # In the dialog that pops up, select the Outgoing Server tab. Check the '''My outgoing server ( | + | # In the dialog that pops up, select the Outgoing Server tab. Check the '''My outgoing server (SMTP) requires authentication''' box. The '''Use same settings as my incoming mail server''' radio button should be selected.<br><br>[[Image:Outlook2010-6.png]]<br><br> |
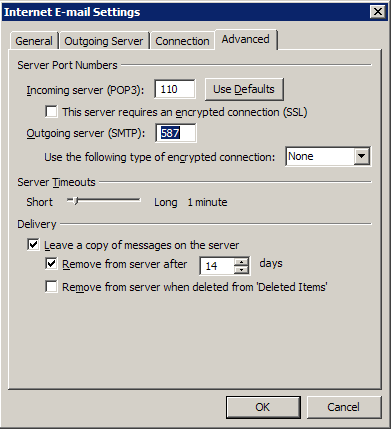
# Select the '''Advanced''' tab. In the '''Outgoing server (SMTP)''' field, delete '''25''' and enter '''587''', as shown. Click '''OK'''.<br><br>[[Image:Outlook2010-7.png]]<br><br> | # Select the '''Advanced''' tab. In the '''Outgoing server (SMTP)''' field, delete '''25''' and enter '''587''', as shown. Click '''OK'''.<br><br>[[Image:Outlook2010-7.png]]<br><br> | ||
# You are now back to the account settings screen. Click the '''Next''' button. A dialog box may pop up asking for your password. You may check the box labeled '''Save this password in your password list''' and click '''OK'''.<br><br>[[Image:Outlook2010-5.png]]<br><br> | # You are now back to the account settings screen. Click the '''Next''' button. A dialog box may pop up asking for your password. You may check the box labeled '''Save this password in your password list''' and click '''OK'''.<br><br>[[Image:Outlook2010-5.png]]<br><br> | ||
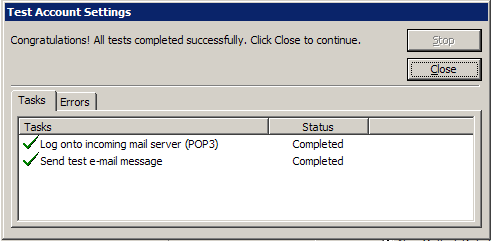
# After the test has completed, click '''Close'''.<br><br>[[Image:Outlook2010-8.png]]<br><br> | # After the test has completed, click '''Close'''.<br><br>[[Image:Outlook2010-8.png]]<br><br> | ||
# Click '''Finish'''. Your new SupraNet mail account is ready to go!<br><br>[[Image:Outlook2010-9.png]]<br><br> | # Click '''Finish'''. Your new SupraNet mail account is ready to go!<br><br>[[Image:Outlook2010-9.png]]<br><br> | ||
Revision as of 10:08, 18 January 2013
To add a new account to Outlook 2010:
- Open Outlook 2010.
- Select the File tab and click on Add Account

- Check the box next to Manually configure server settings or additional server types and click the Next > button.
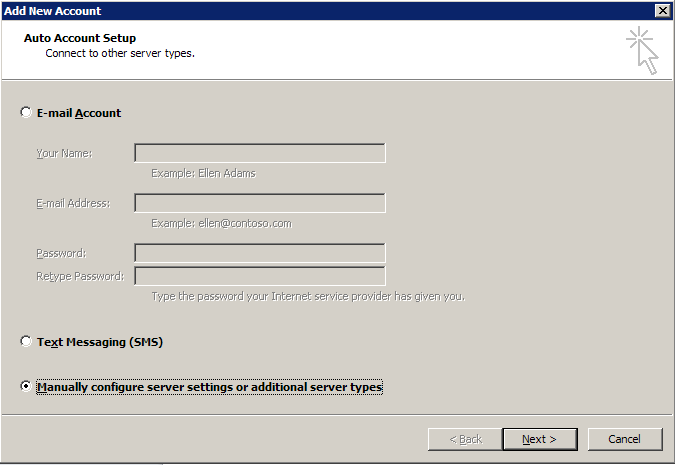
- The Internet E-mail button is selected. Click Next >.

- Enter your information in the fields provided. Your incoming and outgoing mail server will be mail.yourcompany.com. Your user name will be your full email address including @yourcompany.com portion.
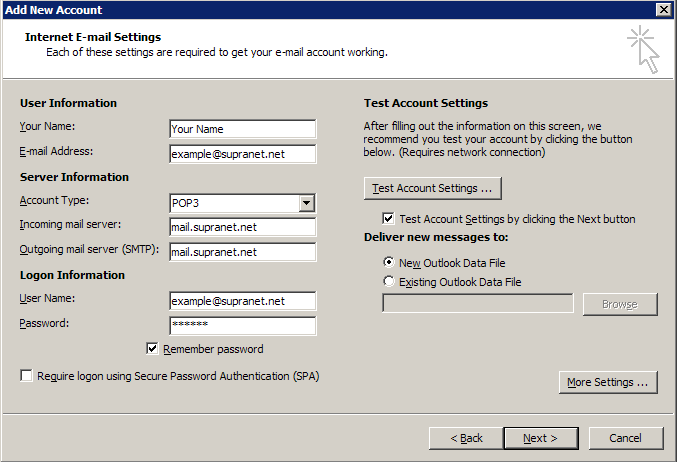
- Click the More Settings... button in the lower right corner.
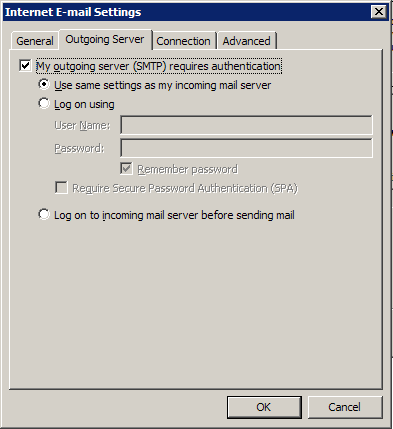
- In the dialog that pops up, select the Outgoing Server tab. Check the My outgoing server (SMTP) requires authentication box. The Use same settings as my incoming mail server radio button should be selected.
- Select the Advanced tab. In the Outgoing server (SMTP) field, delete 25 and enter 587, as shown. Click OK.
- You are now back to the account settings screen. Click the Next button. A dialog box may pop up asking for your password. You may check the box labeled Save this password in your password list and click OK.
- After the test has completed, click Close.
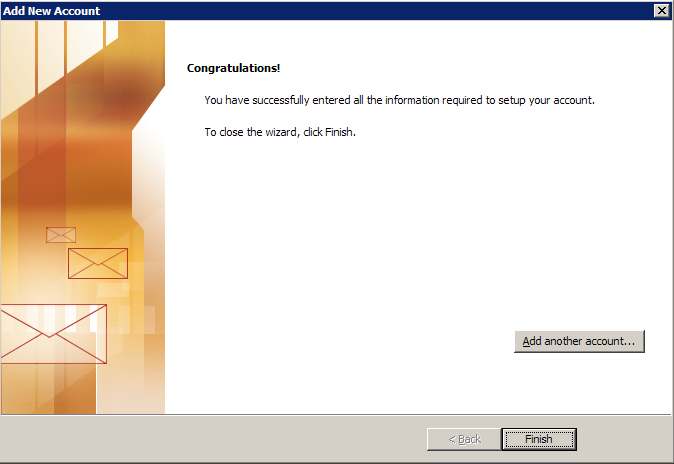
- Click Finish. Your new SupraNet mail account is ready to go!